In MyDataNinja, adding your Meta, Google, TikTok, Bing, or even custom ad accounts is a very easy and straightforward process. With multiple clicks, you can add your accounts, track your desired advertisements, and fetch data to the MyDataNinja platform.
Now let’s go through the process and understand how and why you should add your ad accounts to MyDataNinja.
Connecting Ad Accounts
When you log in to the MyDataNinja platform, go to marketing channels on the left side of the screen. There, you will see different available channels you can connect to, they are TikTok, Meta, Google, Bing, and custom URLs.
In this tutorial, we will go through Google Ad account, but all the channels are basically the same. (Every different channel tutorial will be linked in this blog for better understanding)
Step one – Connect to MyDataNinja
There are four initial steps to every connection process. As a first step, click your desired channel and wait for the popup.

IF THE POPUP DOES NOT APPEAR, TRY AGAIN AFTER TURNING OFF YOUR ADBLOCKER
In the popup, choose your desired Google account and proceed to the next step.

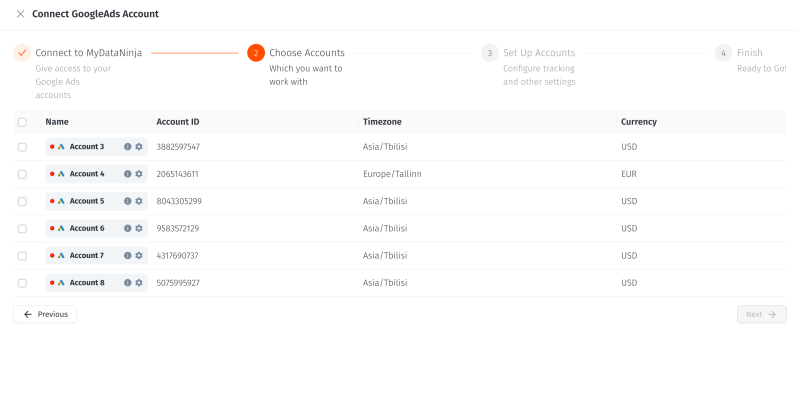
Step two – Choose Accounts
In step two, you have to choose which Ad accounts you want to include in MyDataNinja. As a default, there will be no accounts chosen, so don’t forget to mark every account you want to track.
After choosing all the accounts needed, click next.
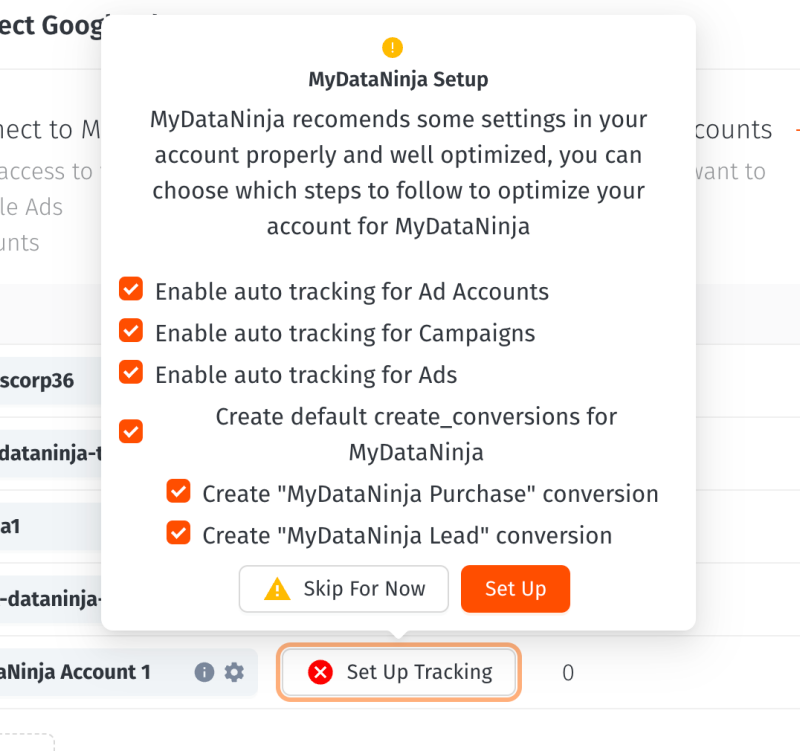
Step Three – Set Up Accounts
In step three, you should give access to tracking on all your advertising accounts, one by one. After clicking the “Set up tracking” button across the advertising accounts, choose your desired options.
If you want, you can click the “Skip for now” button and set up tracking later.
For TikTok ads, Google ads, and Bing ads, there will be four options, but for Meta ads, there will be two.

Setting up may take a few minutes and you will get notified when it’s done
For more tracking information, you can visit our manual and then tracking. There you can see individual manuals for:
Because of API limitations, meta ads require by far the most manual work to set up tracking via UTM parameters
Step Four – Finish
Welcome to MyDataNinja. Your advertising accounts have been added and are being tracked.
All your tracked data will be displayed on the Reporting page. Also, on the Marketing Channels page, all the advertisement accounts that you have added will be displayed below.
Ad Account List
As I’ve mentioned, all the accounts you add will be displayed on the Marketing channels page. There, you can manipulate them as you wish. You can turn on and off your accounts and see how many ads are currently tracking.

Also, there will be information about the last time data was fetched from a specific ad account.
Data is being fetched every hour
There, you can also hide advertisement accounts. (keep in mind that after you hide your advertisement accounts, you have to add them again to appear in the list)