If you have a website that is not Shopify or WordPress-based, and you want to use MyDataNinja, here are the steps for better understanding.
MyDataNinja offers plugins for Shopify and WordPress (with or without WooCommerce). This makes it simpler to integrate our tool into your website. But what happens when your website isn’t built with any of these CMS?
In that case, the integration process is different. Now I will give you a step-by-step guide on how to integrate MyDataNinja into your own website.
Connect Your Accounts
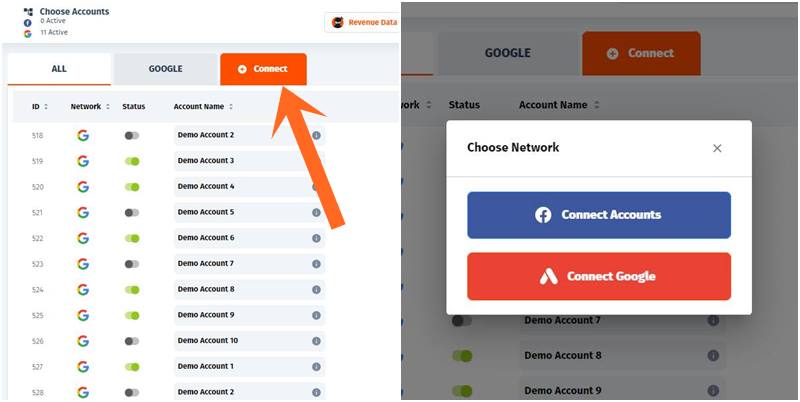
First of all, you should connect your Facebook (Meta) and/or Google advertising accounts to MyDataNinja. After all, MyDataNinja allows you to monitor multiple Ads from different platforms in one simple dashboard.
Connecting your accounts is an easy process.
- Hit connect
- Log in to your Google/Meta account
- Turn your account ON
- Enjoy
This is a brief overview of the process, to see a more in-depth tutorial, please check out our tutorial “How To Connect Your Ad Accounts To MyDataNinja”.
Add Your Website(s)

Adding your website(s) is essential for better tracking. After you add your Website(s), you will be introduced to MyDataNinja (NJ) pixels.
Adding your custom websites to MyDataNinja is also a very straightforward process.
- Enter your website’s URL
- Add your generated script to your website’s code
- Hit verify button
- Enjoy
This is also a brief overview of the website-adding process, for a more detailed explanation, see our manual (“How to Add Websites on MyDataNinja and What Are Pixels“).
Start Tracking
In MyDataNinja, there are two main ways to track your website’s performance through advertisements. They are UTMs and Custom URLs.
UTMs
UTM codes (Urchin Tracking Module) help you see where your website traffic comes from and measure the results or return on investment (ROI) of each campaign, platform, or source. A UTM code is a small bit of text added to the end of a URL to track how a specific digital marketing campaign is performing.
Setting up UTM parameters is very simple. For a more in-depth explanation, here is the tutorial “How to Track Using UTM Parameters in MydataNinja”
Custom URLs
Custom URLs turn your website’s URL into a trackable one. Using custom URLs might be a little more complicated than UTMs, but it’s worth the effort. In this tutorial (“What are Custom URLs and How to Use Them”) you will find all the necessary instructions to get started.
Throwing Custom Events
“Throwing custom events” means triggering or sending specific events based on user actions on your website or app. It’s like sending a signal when something important happens, such as when a user submits a form, clicks a button, or completes a purchase.
These events can then be tracked and used to analyze user behavior or take certain actions, like recording data or triggering another function.
You can create custom events based on what users do on your site. For example, when someone submits a lead form, you can trigger an event called “lead” and also send the form details.
For a more detailed explanation, here is a pre-written manual, “Throwing Custom Events”.
Postbacks
If you want to receive or give out your data, you can use the MyDataNinja Postbacks feature. First of all, create a new Postback URL with the “Add a new postback” button.

You can send data via GET and POST methods.
Postback parameters are features that give you the ability to acquire data. There are different types of parameters. For example:
- Transaction ID – Unique per Postback (unique postback ID)
- Click ID – Unique Click ID
- Currency – Choose the currency you want to use
- Event ID, user ID – Tracking parameters, generated by NJpixel, read more here: Tracking With Postbacks
- Value – Value parameter, with this parameter, you get data about income
- Data 1-2-etc. – Any Additional postback parameters you need to use
![]()
User ID and Event ID are necessary parameters for the postback to attach the Ad. Without them, you can not attach advertisements to Postbacks.
For a more detailed explanation, please read our tutorial “What are Postbacks and Why Do We Need Them”.
CRM
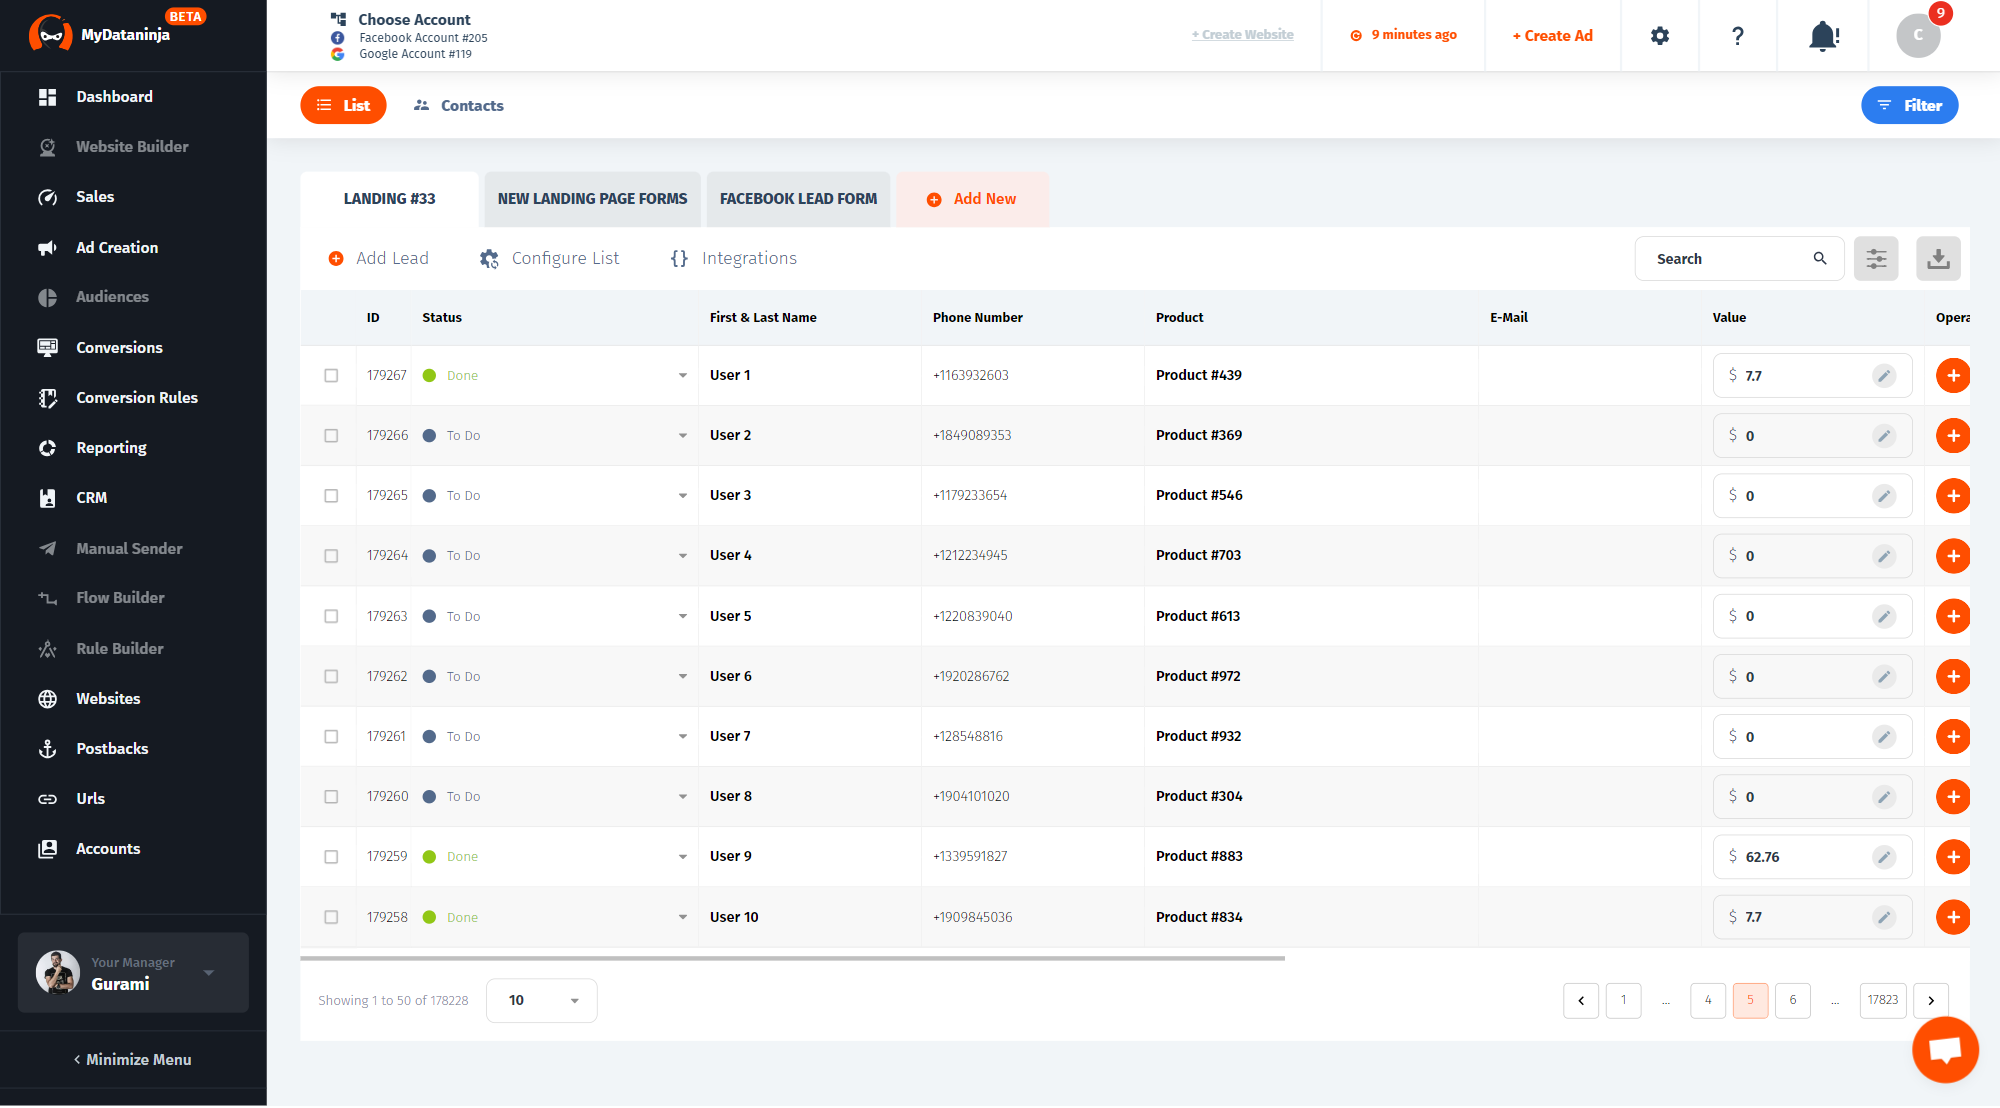
For your data management, you can use MyDataNinja’s basic CRM (customer relationship manager) feature. Our CRM offers you a brand new page, where you can start your brand new CRM and customize it as you wish, or simply integrate your already existing one. MyDataNinja’s customer relationship manager is a simple yet highly customizable one, offering you huge filtering options and many useful features.
For more information and detailed tutorial, read our blog “How to Use CRM in MyDataNinja”.
Reporting

Reporting is a place where all the data is gathered. There you can filter out your information and get useful details about your advertisements. here you will find every detail you need to know for a better understanding of your data and brand success.
The reporting page comes with many useful features which you can use to your benefit. To learn more about these features and overall use of the reporting page, read our blog “How Reporting Works in MyDataNinja”.
Conclusion
This is all you need to track your website’s performance with MyDataNinja and use the gathered data for your benefit.
Good luck using our awesome tool to create better digital marketing campaigns!
If you have any additional questions, please contact us via website live chat (24/7) or via Email.